Showing posts with label Hailey. Show all posts

Wednesday, February 25, 2015

Frozen Winter Birthday Party Part 3 ~ The Slumber

Hi everyone! Welcome back to Hailey's frozen winter birthday party! (If you missed our last posts, you may like to read Frozen Winter Birthday Party Part 1 ~ The Preparations and Frozen Winter Birthday Party Part 2 ~ The Food and Dessert Tables.) Since Hailey's birthday party was also a slumber party, we created a frozen, winter, castle/tent for the girls to sleep. And..... since we asked the girls to wear their Frozen pajamas, for her party, we included a "chillin out" theme as part of our frozen winter theme.


First, Chris and Brice hung the bunting from the ceiling.
Next, Chris and I hung the draping on each side of the entryway.
And then, I set up tables and chairs in our office/playroom
for the girls to eat, paint, and play games.

Tuesday, February 24, 2015

Frozen Winter Birthday Party Part 2 ~ The Food and Dessert Tables

Hi everyone! Welcome back to Hailey's frozen winter birthday party! If you missed our last post, you may like to read Frozen Winter Birthday Party Part 1 ~ The Preparations. As I mentioned in our last post, we were ripping up the carpet in our dining room and office which meant that we still needed to put most of our furniture back before Hailey's party. So, we kept her party simple. We ordered her birthday cake from a local bakery and purchased blue punch. Then, I baked cupcakes and cookies and used our bread tubes to make heart shaped bread for peanut butter and jelly sandwiches. I, also, made heart shape ice cream. (I used the same idea I did in Hailey's princess/prince/knight birthday party.) Next, I filled our apothecary jars with candy in blue, white, and silver colors. We used our white dishes to serve cheese sticks, carrots, black olives, and chips. Seriously, the easiest menu I have ever planned!


When I was going through the photos of cakes
the bakery had done previously, I saw this cake done as
a beach theme cake with seashells, etc.
And then, I saw a picture with snowflakes on cookies.
So, I asked if they could do a cake in these blue
colors and add the snowflakes for a frozen winter theme.
I was very pleased when I picked up the cake.
It turned out even better than what I had pictured in my mind.
It was a beautiful cake and tasted great!
(I added the number seven to the top of the cake.)


Monday, February 23, 2015

Frozen Winter Birthday Party Part 1 ~ The Preparations

Hi everyone! We hope you had a wonderful Valentine's Day! We, as usual, had a very busy weekend, but great too. A few weeks ago we hosted Hailey's birthday parties at our home (We hosted a friend birthday party one evening and a family party the next evening). At first, the only requirement she had for her friend party was that she wanted a slumber party. So, we had originally planned a theme party based on one of Hailey's favorite book series and made plans for a slumber party (Hailey's first slumber party). However, Hailey decided she wanted a Frozen slumber party. So..... we created a winter theme party with various shades of blue and white and included stars, sparkly number sevens, and snowballs. We, also, asked the girls to come dressed in their Frozen pajamas to include Hailey's request for a Frozen party and because it was a slumber party. Since her birthday was quickly approaching, we had a limited amount of time to plan and prepare for her party. And of course, right after the holidays, we decided to rip up the carpets in our dining room and office/playroom (which were the rooms we would be using for her parties). (If you are new to our blog, you may like to read Dining Room ~ Putting Up The Walls.) This meant that our whole house was in disarray. We still had Christmas items in the family room, furniture stacked in the parlor, front entry way, and upstairs, and sanders, stain, and sealer in the dining room and office. Our house was an obstacle course. (And just in case you're wondering, we had not intended our floors to be such an involved project.) Therefore, we needed to keep her party fun as well as easy.


Tuesday, February 10, 2015

Valentine Goodie Bags 2015

We hope everyone had a great weekend! Ours was very busy celebrating Hailey's 7th birthday with family and friends. We will have party posts soon! In the mean time, you may like to check out Our Parties from prior years. But for now, with Valentine's Day just a few days away, I thought you might like to see the goodie bags I put together for Hailey's Valentine Day Party at school. I already had bags and ribbon. So, all I had to do was decide how I wanted to decorate the bags. Last year, I stamped the front of plain brown paper bags and added ribbon (Valentine Day Bags 2014) which I loved, but I wanted to do something different this year. When I found this beautifully done free printable from Twig & Thistle, I knew that it would work perfect.

I printed the image directly onto the bags,
folded the top of the bags down,
made hole punches and tied ribbon
through the holes to close the bags.
I made the bow on the other side
of the bag so it wouldn't detract from
the beautiful design of the printable.
The bow also "prettied up" the other side of the bag. :)


As for the goodies inside,
I made candy hearts with my candy mold pan
and added some cute Valentine themed items.


To make the candy hearts, I mixed
1 tsp. of vegetable oil in 8 ounces of candy or chips
and melted the candy/chips in the microwave until smooth.
I spooned the mixture into the mold.
And then, put the mold into the refrigerator for about one hour.
For the red hearts, I used red melt candy
For the chocolate hearts, I used milk chocolate chips
And for the white and pink hearts,
I used white chocolate chips
and added red food coloring to make the pink.

These were so quick, easy and inexpensive.
I love the way they turned out!
We hope everyone has a happy Valentine's Day!

Thanks for visiting Our Family Inspired Home!

We would love for you to follow us!

Tuesday, January 6, 2015

It's A New Year, "Make Everyday A Happy Day"!

Hope everyone had a wonderfully blessed Christmas! Ours was fantastic! As we look forward to the new year, we are setting our goals. And while reading, perusing, and looking for inspiration for all of the projects we need to complete in our new home, I came across this quote. "Normal is getting dressed in clothes that you buy for work and driving through traffic in a car that you are still paying for - in order to get to the job you need to pay for the clothes and the car, and the house you leave vacant all day so you can afford to live in it" -Ellen Goodman. And I thought, wow this is so true! We get so caught up in this circle that we forget to just "really live" in our home, along the way. However, we don't want a vacant home. We don't want to be a part of that circle. We want to "really live" in our home and slow down to enjoy the moment. We want to "make everyday a happy day". This is what we are working towards. This is our ultimate goal. Afterall, that is why we purchased our new home which led to the name of our blog, Our Family Inspired Home. As for the work on our home, we finally, have all areas of our home livable (for those who are new to our blog, we purchased a foreclosed home that was empty for a few years and needs a lot of work). We have had a new furnace and central air system with all new duct work installed, have one major project in our home (Kitchen Renovation Part 1, Kitchen Renovation Part 2, Kitchen Renovation Part 3) almost complete, and all other rooms are usable (although, not pretty yet :) ). So, although there is still so much more to do, we are striving to "live" in our new home, slow down to enjoy the moment, and "make everyday a happy day".


Thanks for visiting Our Family Inspired Home!

We would love for you to follow us!

Thursday, October 23, 2014

Kitchen Renovation Part 3 ~ Putting Up The Walls

We hope everyone is having a great week! We are, finally, starting to see the end of our kitchen renovation! It's coming along nicely and we can't wait for it to be finished. As I mentioned in Kitchen Renovation Part 1 and Kitchen Renovation Part 2, we renovated our kitchen in sections as we worked our way around the room. However, the drywalling we tried to complete, as much as possible, at one time.


We used the T's Chris made
(to aid us in drywalling our Dining Room)
to hang our drywall in the kitchen.


Brice helped score and cut drywall.


And, of course, Hailey wanted to learn
how to score and cut drywall, too.


 Derek helped tape and mud.


 Nathan helped sand.

  
And then, Chris primed the walls.

  
Our rockstar, Super Drywall Girl, celebrated
with a little dance. 


We will be back next week to share what we did next!

Thanks for visiting Our Family Inspired Home!

We would love for you to follow us!


Thursday, October 16, 2014

Kitchen Renovation Part 2

Today we are sharing the demolition of our kitchen renovation. If you missed how our kitchen looked when we purchase our home and when we moved in, you may like to read: Our HomeMoving Days, and Kitchen Renovation Part 1.We needed to do our kitchen in stages because we needed to make our home functional and work within our financial budget. So, we started on one side of the room and worked around the room as we were able. Yes, in most cases it would be better to just demo and put the room back together all at one time. However, that was not true in our case. We were trying to make our home livable and functional. Then, proceed with what we wanted. Need won out against want. Since we needed to be able to use the kitchen, while trying to do all of the other work in the kitchen, we were concerned that the new flooring would be damaged. So we also, needed to work around the old flooring as long as possible.


Chris and Brice got to work taking out the old cabinets.


Then, Chris started gutting the walls and


ceiling.

We found a few interesting things in the ceiling.....


Hailey wanted to help.


And then, we cleaned up.


We saved the nails we pulled out of the lath.


We will be back soon to share what we did next!

Thanks for visiting Our Family Inspired Home!

We would love for you to follow us:

Thursday, March 27, 2014

Dining Room ~ Putting Up The Walls

Goodness, it has been a very long winter! We are sooooo ready for spring. And as soon as spring is here, we will start working outside. Our plan is to work as much as we are able outside during spring, summer, and fall, as the weather allows. And, work on the inside of our home in the fall, winter, and spring when the weather is not so great. Our goal has been to make our home livable and then later get to the fun stuff. So, this means that many of the projects we started in our home will not be fully completed until later. Today, we are sharing our dining room. Although we, usually, eat together in our sunroom which is off our family room, we have already used our dining room for Thanksgiving, Christmas, and birthday parties. I love having a formal dining room!


This is how our dining room looked
on the day we purchased our new home.


Chris got to work drywalling and mudding.


Then, Brice helped sand.


Chris primed the walls and ceiling.


Chris and I puttied the windows.


And then, we started painting the windows.


And here's a tip. Chris built 2 T's out of 2x4's
to help hold the drywall up against the ceiling.

Or, you can use it as a balance beam to 
entertain the little ones.....


Here's a sneak peek of our dining room.


And just in case you missed it, you can see how
our dining room looked for Hailey's birthday in our posts:
(Hailey's Birthday Strawberry Shortcake Part 2
and
Hailey's Birthday Strawberry Shortcake Part 3)

We still need to replace the floor and lighting,
add crown molding, baseboards, and wainscoting.
So, it will be a while before we show
our dining room reveal.
But, for now, it's done.

We would love for you to follow us!
Facebook
Google +
Twitter
Pinterest
Hometalk

Thanks for visiting Our Family Inspired Home!

Friday, February 21, 2014

Hailey's Birthday Strawberry Shortcake Part 3

Welcome back to Hailey's Strawberry Shortcake "berry" special birthday party! As I was planning goodie bags for Hailey's school Valentine's Day party (Valentine's Day Bags 2014) and preparing for Hailey's birthday (Hailey's Birthday Strawberry Shortcake Part 1), I mentioned that we hosted two birthday parties. One for Hailey's school friends on Saturday and one for family on Sunday. So all of the supplies we needed were purchased together, at Target, Hobby Lobby, Party City, and Walmart. In our last post we shared the party we hosted for Hailey's friends, Hailey's Birthday Strawberry Shortcake Part 2. Today, we are sharing the family party we hosted. For the family celebration we served lunch. We set the table up for a soup and salad bar luncheon and moved the dessert table to our buffet. We changed out the Strawberry Shortcake plates for thicker plastic clear plates that we can use for other occasions. We, also, changed out the Strawberry Shortcake napkins for green and white stripe napkins and changed pink plasticware to green plasticware. Two different parties with one theme! And not only did we still have a Strawberry Shortcake theme, but it also felt a little bit like spring. We are sooooo looking forward to spring!


Remember this was the table
set up the day before, on Saturday.


And this was the table set up
the next day, on Sunday.


On Saturday.....


And on Sunday.


Hailey loved and enjoyed the whole weekend!
We had such a great time celebrating with family and friends!

We would love for you to follow us on:
FacebookGoogle +TwitterHometalkPinterest.

Thanks for visiting Our Family Inspired Home!
Parties

Thursday, February 20, 2014

Hailey's Birthday Strawberry Shortcake Part 2

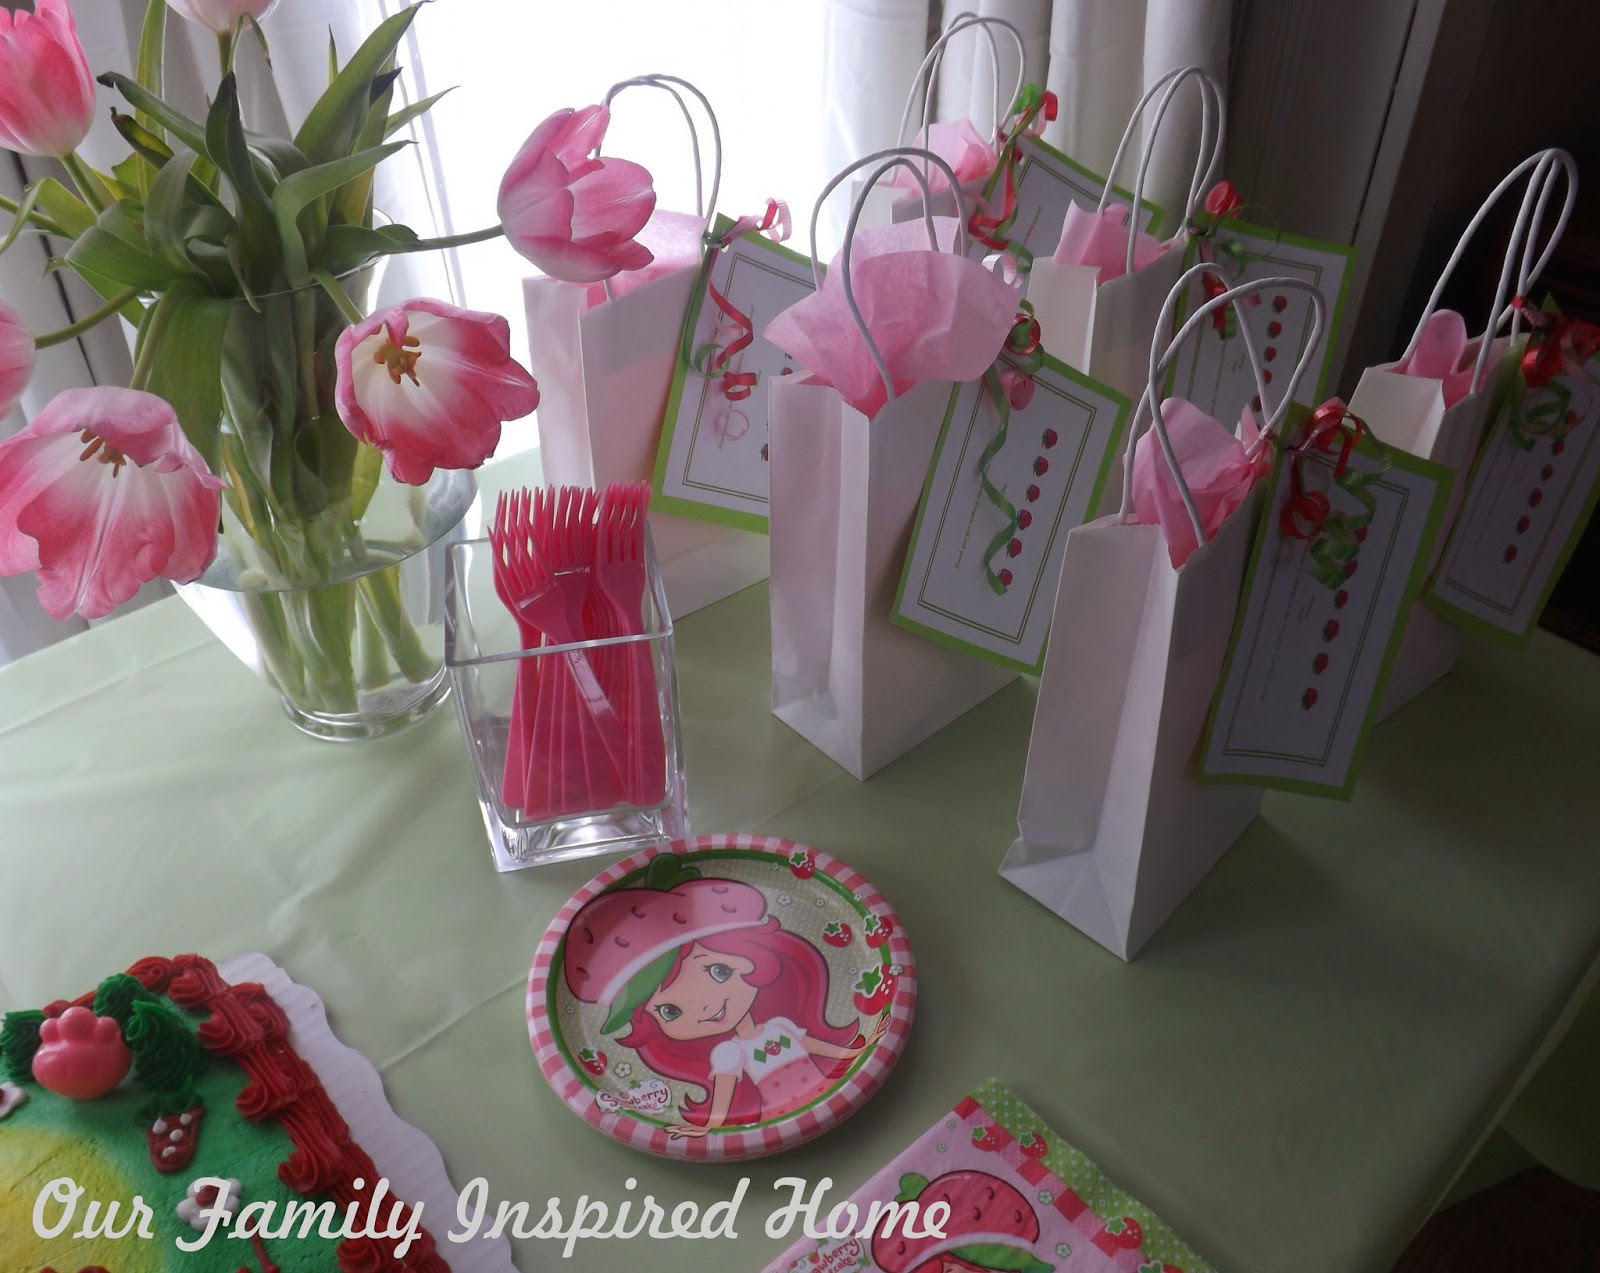
Welcome to Hailey's "berry" special birthday party! As I mentioned in our last post, Hailey's Birthday Strawberry Shortcake Part 1, we hosted two birthday parties, one for her school friends and one for family. Today we are sharing the party for her school friends. We displayed the goodie bags with thank you cards along with fresh flowers, and candy in apothecary jars as part of the Strawberry Shortcake theme decor. We set up an apron painting table for her friends so they were able to make their aprons as they arrived. And, of course, we served cake and ice cream. While planning her birthday parties, I was also planning her school Valentine's Day party goodie bags, Valentine's Day Bags 2014. So, any supplies that I needed were purchased together at Target, Hobby Lobby, Party City, and the cake was ordered from Walmart. Our Sweet Baby Love was in awe. Every time she walked into our dining room she would say, "Oh Mommy, it's so pretty!"


Hailey all ready to welcome her guests.


Hailey and her friends had a great time!

In our next post we will share
how we changed it up
a little bit to include lunch.
Two different parties using one theme.
Awesome!

We would love for you to follow us on FacebookGoogle +TwitterPinterest, and Hometalk!

Thanks for visiting Our Family Inspired Home!